Completing the CNN
Date : 2022.10.23
*The contents of this book is heavily based on Stanford University’s CS231n course.
[Implementing Conv & Pooling Layers]
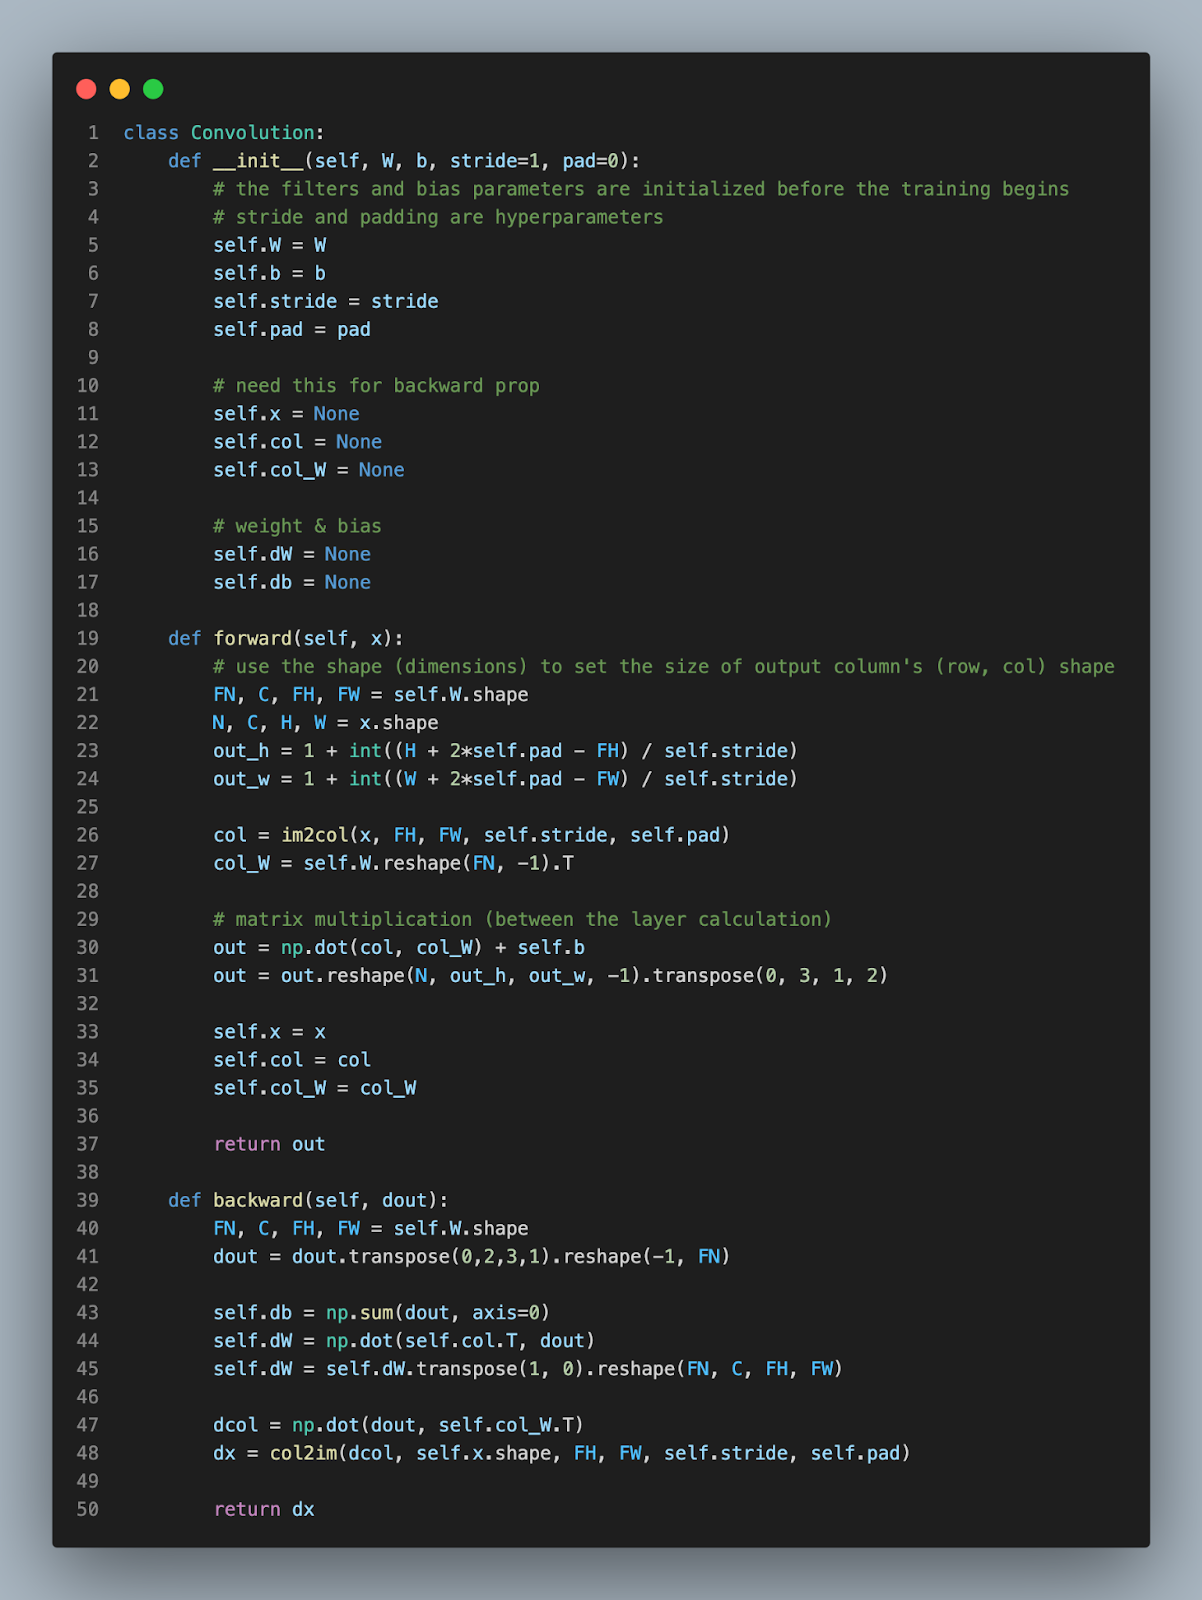
Like every other function (layer), the conv and pooling layer requires both forward and backward propagations.
However, 4 dimensional matrix applications are no walk in the park. So, we’re going to implement a technique called ‘im2col’ (image to column) to simplify the multidimensional matrices and expedite matrix calculations.
The critical downside of higher dimension calculation is the time and space efficiency. ‘im2col’ transforms the images into lower dimensions.


Well here's an additional explanation generated by chatgpt. Enjoy.
- First, you take your input image and divide it into small regions called "windows." These windows are the same size as the filters you will be using.
- For each window, you take all of the pixel values and rearrange them into a column. So if your window is 3x3 (which is a common size for filters), then you would have a column with 9 values (one for each pixel in the window).
- Once you have a column for each window, you can then apply your filters to these columns. This is done by taking the dot product (essentially a fancy way of multiplying and adding up a bunch of numbers) of the filter and the column.
- The output of this step is a set of filtered images, one for each filter you used. These filtered images can then be used to identify features in the input image, such as edges, corners, and so on.
Im2col is a useful technique because it allows you to apply the same set of filters to an entire image, rather than applying them one window at a time. This makes the process of feature extraction much faster and more efficient.

Next up is the Pooling layer.


The pooling layer is similar to the conv layer. It also implements the im2col technique, however due to the independence of the pooling layer, the steps are more clear.
- Apply im2col on the input data
- Select the max values for each pool (max pooling)
- Reshape the data into an appropriate shape

[The Complete CNN]
Though the CNN presented below is a complete version, the number of layers is less than a deeper network that we will see in the future post.

[Simple Conv Network]

[Train Simple Conv Network]

[Accuracy Results]

[Conclusion]
The final accuracy of the simple CNN can increase if we increase the number of epochs. You can try 20 epochs and see that the network is capable of reaching 99% accuracy. However, I stopped at 98% because my mac was about to explode..
Nevertheless, the key point of machine learning is to make machines capable of doing human tasks more efficient and faster. Imagine a human categorizing the MNIST data. Out of a 100 images, a human can potentially get 4~6 images miscategorized. Thus, a machine accuracy of 98% shows that the model has already outpaced human capabilities.
'Tech Development > Deep Learning (CNN)' 카테고리의 다른 글
| Deep Convolutional Neural Network (0) | 2022.12.25 |
|---|---|
| Image Visualization and Primary Networks (feat. LeNet, AlexNet) (0) | 2022.12.25 |
| Convolutional & Pooling Layers (0) | 2022.12.25 |
| Batch Initialization, Overfitting, Dropout, and Optimization (0) | 2022.12.16 |
| Weight Initialization, Xavier Weights, Dropout, and Setting Hyperparameters (0) | 2022.12.16 |


댓글